

질문은 자유롭게 남겨주세요!
추가된 코드와 커밋
private final ObjectMapper objectMapper;

    @Bean
    public SecurityFilterChain securityFilterChain(HttpSecurity http) throws Exception {
        http.cors(AbstractHttpConfigurer::disable).csrf(AbstractHttpConfigurer::disable).formLogin(
                conf -> conf.loginProcessingUrl("/api/v1/auth/login").successHandler(
                    ((request, response, authentication) -> sendResponse(response, "로그인 성공")))
                    .failureHandler(this::entryPoint))
            .exceptionHandling(e -> e.authenticationEntryPoint(this::entryPoint)
                .accessDeniedHandler(this::accessDeniedHandler));
        return http.build();
    }

    private void entryPoint(HttpServletRequest request, HttpServletResponse response,
        RuntimeException e) throws IOException {
        response.setStatus(401);
        sendResponse(response, ExceptionResponse.of(e));
    }

    private void accessDeniedHandler(HttpServletRequest request, HttpServletResponse response,
        RuntimeException e) throws IOException {
        response.setStatus(403);
        sendResponse(response, ExceptionResponse.of(e));
    }

    private <T> void sendResponse(HttpServletResponse response, T e) throws IOException {
        Response<T> body = new Response<>(e);
        String bodyString = objectMapper.writeValueAsString(body);
        response.setContentType("application/json");
        response.setCharacterEncoding("UTF-8");
        response.getWriter().write(bodyString);
    }
2. Spring Security 일반 로그인 · jsween5723/spring-security-tistory@e0ba868
jsween5723 committed Aug 30, 2024
github.com
필터체인
일반 로그인 기능을 설명하기 앞서 스프링 시큐리티 필터체인을 살펴보자
Architecture :: Spring Security
The Security Filters are inserted into the FilterChainProxy with the SecurityFilterChain API. Those filters can be used for a number of different purposes, like authentication, authorization, exploit protection, and more. The filters are executed in a spec
docs.spring.io
org.springframework.security.web.session.DisableEncodeUrlFilter@404db674,
org.springframework.security.web.context.request.async.WebAsyncManagerIntegrationFilter@50f097b5,
org.springframework.security.web.context.SecurityContextHolderFilter@6fc6deb7,
org.springframework.security.web.header.HeaderWriterFilter@6f76c2cc,
org.springframework.security.web.csrf.CsrfFilter@c29fe36,
org.springframework.security.web.authentication.logout.LogoutFilter@ef60710,
org.springframework.security.web.authentication.UsernamePasswordAuthenticationFilter@7c2dfa2,
org.springframework.security.web.authentication.ui.DefaultLoginPageGeneratingFilter@4397a639,
org.springframework.security.web.authentication.ui.DefaultLogoutPageGeneratingFilter@7add838c,
org.springframework.security.web.authentication.www.BasicAuthenticationFilter@5cc9d3d0,
org.springframework.security.web.savedrequest.RequestCacheAwareFilter@7da39774,
org.springframework.security.web.servletapi.SecurityContextHolderAwareRequestFilter@32b0876c,
org.springframework.security.web.authentication.AnonymousAuthenticationFilter@3662bdff,
org.springframework.security.web.access.ExceptionTranslationFilter@77681ce4,
org.springframework.security.web.access.intercept.AuthorizationFilter@169268a7]
위 처럼 많은 필터들이 있다.
패키지명을 보면 어떤 역할을 하는 지 알 수 있다.
일반 로그인 기능을 이해하기 위해 알아야 할 부분은
authentication 패키지 하위에 존재하는
UsernamePasswordAuthenticationFilter
DefaultLoginPageGeneratingFilter
이렇게 두 가지이다.
기본 로그인 폼 페이지
ui.DefaultLoginPageGeneratingFilter
ui 패키지에 있듯이 로그인 페이지를 렌더링하는 역할을 한다.
    private void doFilter(HttpServletRequest request, HttpServletResponse response, FilterChain chain)
            throws IOException, ServletException {
        boolean loginError = isErrorPage(request);
        boolean logoutSuccess = isLogoutSuccess(request);
        if (isLoginUrlRequest(request) || loginError || logoutSuccess) {
            String loginPageHtml = generateLoginPageHtml(request, loginError, logoutSuccess);
            response.setContentType("text/html;charset=UTF-8");
            response.setContentLength(loginPageHtml.getBytes(StandardCharsets.UTF_8).length);
            response.getWriter().write(loginPageHtml);
            return;
        }
        chain.doFilter(request, response);
    }
위 처럼 GET login url 요청일 때 동작한다. 아닐 경우 페이지를 반환하지않고 다음 필터로 넘기는 것을 볼 수 있다.
별 다를 것 없이 로그아웃 성공 시, 인증 인가 실패 시, 로그인 링크 접속 시 로그인 페이지를 반환하는 역할을 한다.
일반 로그인 필터 O 로그인 폼 페이지 X 하고 싶을 때
package org.springframework.security.config.annotation.web.configurers
위 패키지는 Security Config의 HttpSecurity 체인에서 해당 옵션들을 기준으로 각 필터별로 적용을 하기 위한 클래스들이 있는 패키지이다.
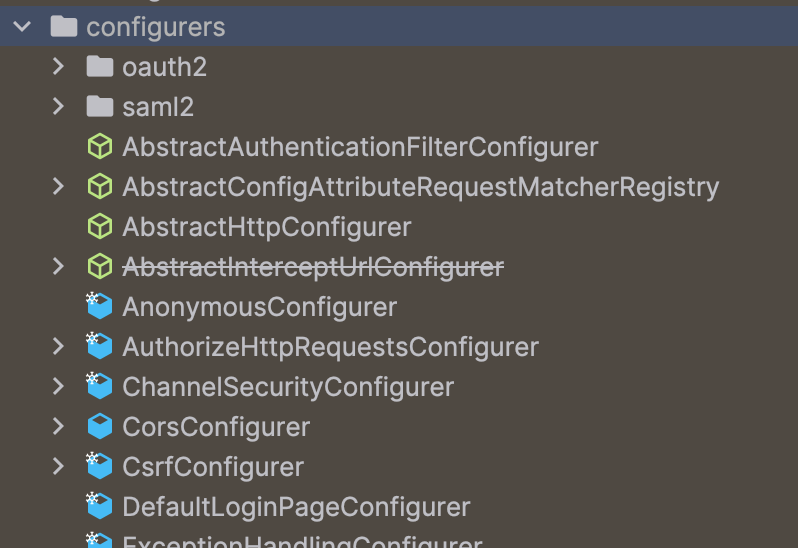
여기서 DefaultLoginPageConfigurer 클래스를 보면 언제 이 필터 자체가 활성화되는지를 알 수 있다.
    @Override
    @SuppressWarnings("unchecked")
    public void configure(H http) {
        AuthenticationEntryPoint authenticationEntryPoint = null;
        ExceptionHandlingConfigurer<?> exceptionConf = http.getConfigurer(ExceptionHandlingConfigurer.class);
        if (exceptionConf != null) {
            authenticationEntryPoint = exceptionConf.getAuthenticationEntryPoint();
        }
        if (this.loginPageGeneratingFilter.isEnabled() && authenticationEntryPoint == null) {
            this.loginPageGeneratingFilter = postProcess(this.loginPageGeneratingFilter);
            http.addFilter(this.loginPageGeneratingFilter);
            LogoutConfigurer<H> logoutConfigurer = http.getConfigurer(LogoutConfigurer.class);
            if (logoutConfigurer != null) {
                http.addFilter(this.logoutPageGeneratingFilter);
            }
        }
    }
위 처럼 exception entrypoint가 null일 때, 따라서 인증 인가 시 오류가 발생 했을 때 대안이 존재하지 않는다면 로그인 페이지를 반환하도록 의도한 것이다.
참고:
Spring Security 로그인은 활성화하면서 로그인 폼 페이지는 없애는 방법
Spring Security의 기능들을 최대한 사용하면서도, api 환경에 맞지 않는 몇몇 설정을 제외하여 설정해본 글입니다.
velog.io
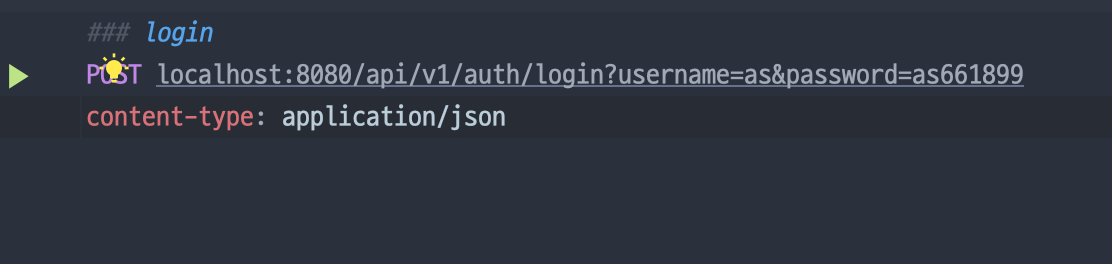
login processing url 및 entry point를 지정했을 때 로그인 시도시 404가 발생하는 이유
@Bean
public SecurityFilterChain securityFilterChain(HttpSecurity http) throws Exception {
http.cors(AbstractHttpConfigurer::disable).csrf(AbstractHttpConfigurer::disable).formLogin(
conf -> conf.loginProcessingUrl("/api/v1/auth/login"))
.exceptionHandling(e -> e.authenticationEntryPoint(this::entryPoint)
.accessDeniedHandler(this::accessDeniedHandler));
return http.build();
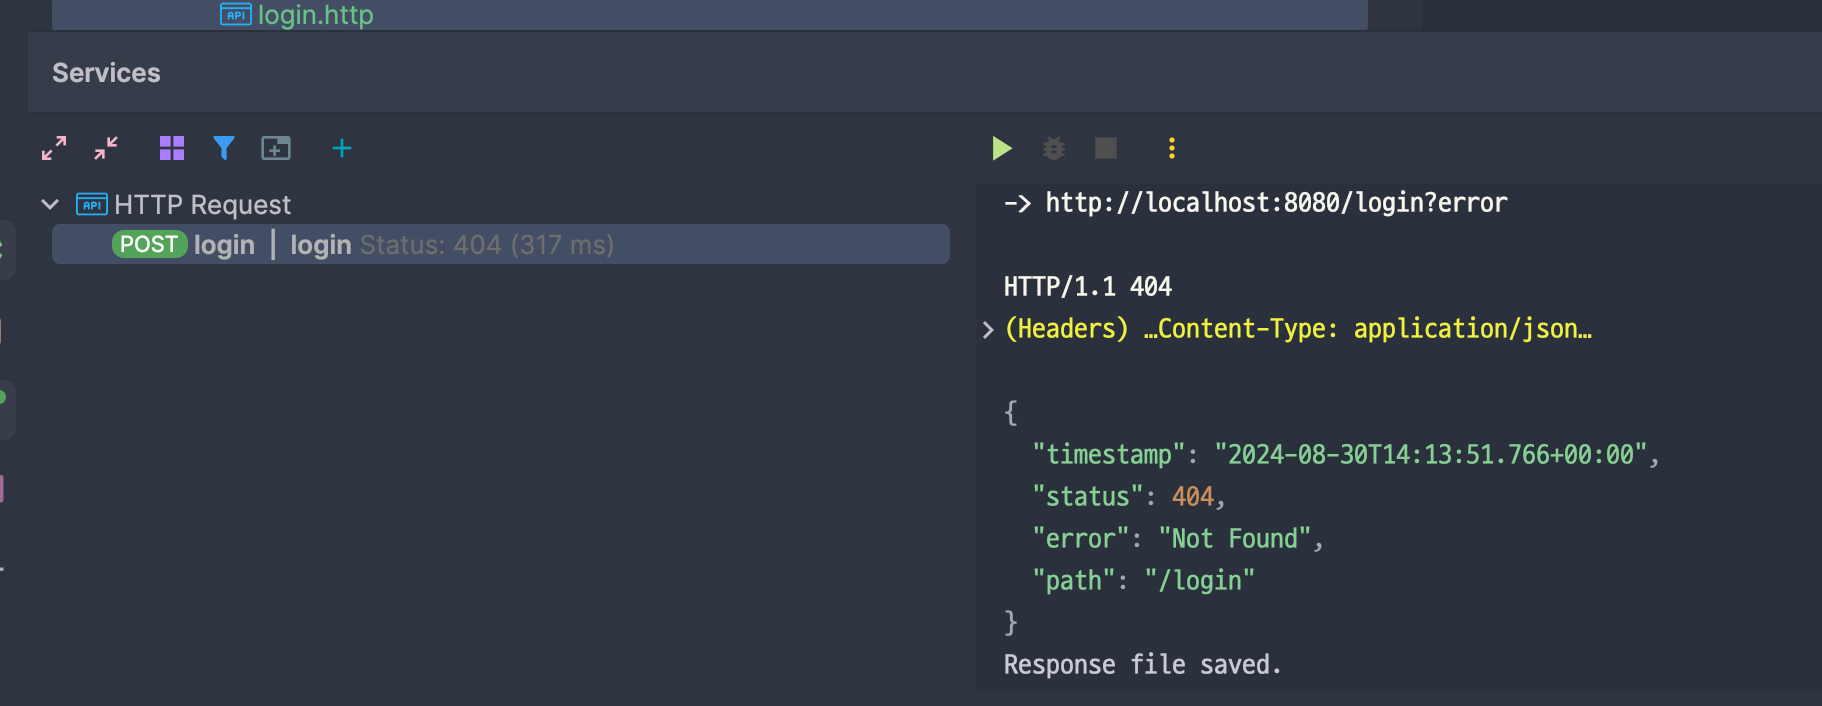
}위처럼 entry point를 지정하고 요청을 보내도 이상한 곳으로 요청이 날아가며 엔트리포인트가 동작하지 않는 것을 볼 수 있다.
이것은 로그인 폼 페이지 기능과도 관련이 있지만 로그인 기능을 담당하는 UsernamePasswordAuthenticationFilter와도 관련이 있다.
해당 체인 중 loginProcessingUrl은 UsernamePassowrdAuthenticationFilter가 동작하는 url을 지정하는 옵션이다.
시큐리티는 일반 로그인은 폼에서 동작하는 것을 기반으로 기본값을 지정해두었기 때문에 성공, 실패 시 동작도 마찬가지다.
기본적으로 redirect를 기반으로 동작하도록 구성되어 있으며, entry point로 인해 login page 필터는 준비돼있지 않아
실패시 /login 페이지가 없어 404가 발생하는 것이다.
또한 마찬가지로 성공시에도 / 페이지가 기본 redirect url로 지정되어 있어 404가 발생할 수 있다.
이를 방지하기 위해 failure handler와 success handler를 정의해주어야 한다.
잘 설정해주면
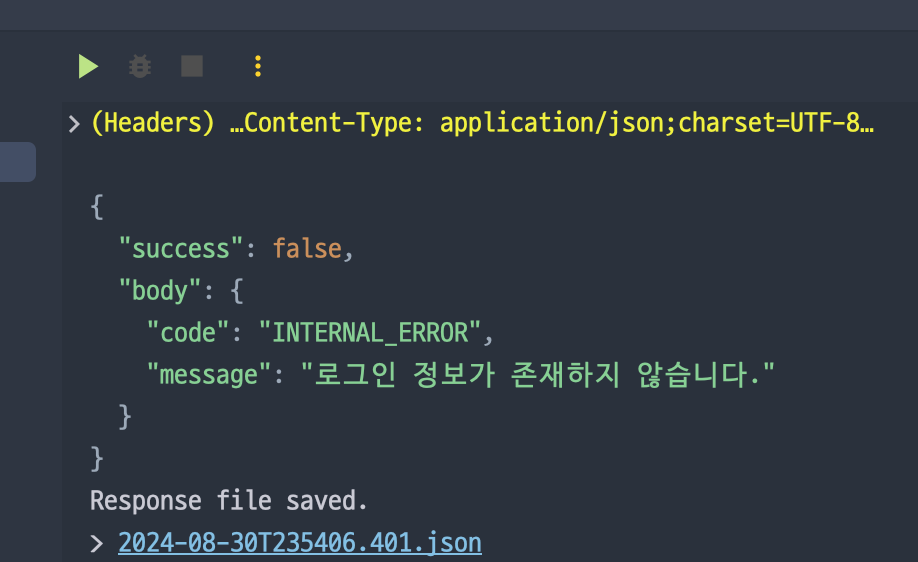
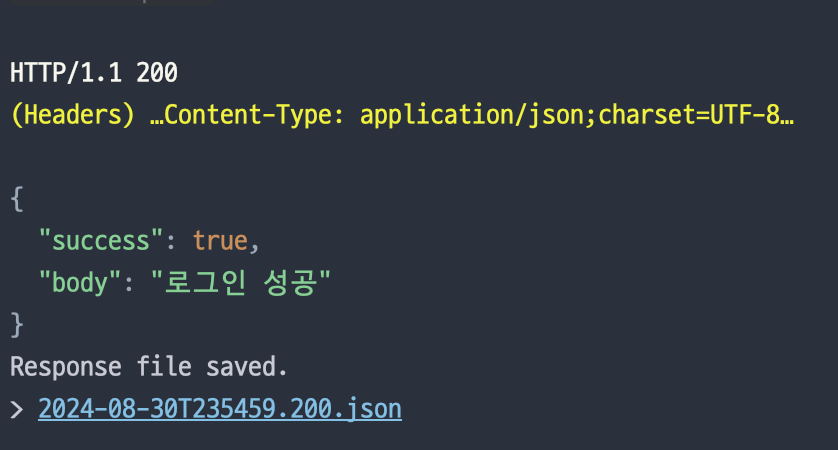
이렇게 원하는 결과가 잘 나오는 것을 알 수 있다.
SSR 방식이라면..
만약 SSR 방식이라면 defaultSuccessUrl, failureUrl 체인함수를 통해 페이지를 지정해주면 된다.
loginPage 체인함수는 단순히 스프링 기본 로그인 폼 페이지 url을 변경하는 것이니 주의.
defaultSuccessUrl 두번째인자로 boolean값을 주어 로그인 성공시 이전페이지로 가지않고 항상 일관된 페이지로 갈 수 있게끔도 할 수 있다.
일반 로그인 기능
일반 로그인 기능은 UsernamePasswordAuthenticationFilter에서 수행한다.
        if (this.postOnly && !request.getMethod().equals("POST")) {
            throw new AuthenticationServiceException("Authentication method not supported: " + request.getMethod());
        }
        String username = obtainUsername(request);
        username = (username != null) ? username.trim() : "";
        String password = obtainPassword(request);
        password = (password != null) ? password : "";
        UsernamePasswordAuthenticationToken authRequest = UsernamePasswordAuthenticationToken.unauthenticated(username,
                password);
        // Allow subclasses to set the "details" property
        setDetails(request, authRequest);
        return this.getAuthenticationManager().authenticate(authRequest);
사전에 살펴본 loginProcessingUrl에서 POST application/x-www-form-urlencoded 으로 동작한다.
필터에서는 Request를 분석해 파라미터를 기반으로 UsernamePasswordAuthenticationToken을 생성한다.
usernameParameter, passwordParameter로 지정해둔 필드 (기본은 username, password이다.)를
obtain~ 메소드들로 파싱하여 토큰을 생성한다.
이후 AuthenticationManager의 DaoAuthenticationProvider를 통해 인증 및 Authentication 객체를 반환받아 SecurityContext에 저장합니다.
DaoAuthenticationProvider 동작
주석 부분만 읽어주시면 됩니다.
public Authentication authenticate(Authentication authentication) throws AuthenticationException {
        Assert.isInstanceOf(UsernamePasswordAuthenticationToken.class, authentication,
                () -> this.messages.getMessage("AbstractUserDetailsAuthenticationProvider.onlySupports",
                        "Only UsernamePasswordAuthenticationToken is supported"));
        String username = determineUsername(authentication);
        boolean cacheWasUsed = true;
        UserDetails user = this.userCache.getUserFromCache(username);
        // 1. 자주 로그인 할 경우 인메모리 캐싱
        if (user == null) {
            cacheWasUsed = false;
            try {
                user = retrieveUser(username, (UsernamePasswordAuthenticationToken) authentication);
                //2. UserDetailsService 빈으로 Token의 username 활용하여 UserDetails 취득
            }
            catch (UsernameNotFoundException ex) {
                this.logger.debug("Failed to find user '" + username + "'");
                if (!this.hideUserNotFoundExceptions) {
                    throw ex;
                }
                throw new BadCredentialsException(this.messages
                    .getMessage("AbstractUserDetailsAuthenticationProvider.badCredentials", "Bad credentials"));
            }
            Assert.notNull(user, "retrieveUser returned null - a violation of the interface contract");
        }
        try {
            this.preAuthenticationChecks.check(user);
            additionalAuthenticationChecks(user, (UsernamePasswordAuthenticationToken) authentication);
            // 아래에 있지만 PasswordEncoder와 협력하여 비밀번호 비교 및 인증
        }
        catch (AuthenticationException ex) {
            if (!cacheWasUsed) {
                throw ex;
            }
            // There was a problem, so try again after checking
            // we're using latest data (i.e. not from the cache)
            cacheWasUsed = false;
            user = retrieveUser(username, (UsernamePasswordAuthenticationToken) authentication);
            this.preAuthenticationChecks.check(user);
            additionalAuthenticationChecks(user, (UsernamePasswordAuthenticationToken) authentication);
        }
        this.postAuthenticationChecks.check(user);
        if (!cacheWasUsed) {
            this.userCache.putUserInCache(user);
        }
        Object principalToReturn = user;
        if (this.forcePrincipalAsString) {
            principalToReturn = user.getUsername();
        }
        return createSuccessAuthentication(principalToReturn, authentication, user);
        //Authentication 객체 반환 (isAuthenticated = true)
    }
protected void additionalAuthenticationChecks(UserDetails userDetails,
UsernamePasswordAuthenticationToken authentication) throws AuthenticationException {
if (authentication.getCredentials() == null) {
this.logger.debug("Failed to authenticate since no credentials provided");
throw new BadCredentialsException(this.messages
.getMessage("AbstractUserDetailsAuthenticationProvider.badCredentials", "Bad credentials"));
}
String presentedPassword = authentication.getCredentials().toString();
if (!this.passwordEncoder.matches(presentedPassword, userDetails.getPassword())) {
this.logger.debug("Failed to authenticate since password does not match stored value");
throw new BadCredentialsException(this.messages
.getMessage("AbstractUserDetailsAuthenticationProvider.badCredentials", "Bad credentials"));
}
}로그인의 결과로 Authentication의 principal엔 UserDetails가 저장되고, context에 저장된다.
로그인 후 성공 시 필터 내부 동작
AbstractAuthenticationProcessingFilter에 정의되어 있다. 이 필터는 OAuth2 관련 필터도 상속받고 있다.
    protected void successfulAuthentication(HttpServletRequest request, HttpServletResponse response, FilterChain chain,
            Authentication authResult) throws IOException, ServletException {
        SecurityContext context = this.securityContextHolderStrategy.createEmptyContext();
        context.setAuthentication(authResult);
        this.securityContextHolderStrategy.setContext(context);
        this.securityContextRepository.saveContext(context, request, response);
        if (this.logger.isDebugEnabled()) {
            this.logger.debug(LogMessage.format("Set SecurityContextHolder to %s", authResult));
        }
        this.rememberMeServices.loginSuccess(request, response, authResult);
        if (this.eventPublisher != null) {
            this.eventPublisher.publishEvent(new InteractiveAuthenticationSuccessEvent(authResult, this.getClass()));
        }
        this.successHandler.onAuthenticationSuccess(request, response, authResult);
    }
다음 요청 시 로그인 정보를 활용하기 위한 처리를 한다.
        SecurityContext context = this.securityContextHolderStrategy.createEmptyContext();
        context.setAuthentication(authResult);
        this.securityContextHolderStrategy.setContext(context);
        this.securityContextRepository.saveContext(context, request, response);
이 부분이며 현재 스레드 로컬에도 저장하고, 첫 게시글에서 설명했듯이 default로 세션으로 지정되어있는 context repository에도 저장한다.
해당 정보는 org.springframework.security.web.context.SecurityContextHolderFilter에서 불러와지며 매 요청 시 쿠키의 JSESSIONID를 통해 불러와져 재사용된다. 자세한 것은 OAuth2 로그인 설명 후 분석해보겠다.
이후 success handler를 통해 진행되며 configurer코드를 보면 기본값은 defaultSuccessUrl로 가게되어있다.
로그인 실패 시 동작
    protected void unsuccessfulAuthentication(HttpServletRequest request, HttpServletResponse response,
            AuthenticationException failed) throws IOException, ServletException {
        this.securityContextHolderStrategy.clearContext();
        this.logger.trace("Failed to process authentication request", failed);
        this.logger.trace("Cleared SecurityContextHolder");
        this.logger.trace("Handling authentication failure");
        this.rememberMeServices.loginFail(request, response);
        this.failureHandler.onAuthenticationFailure(request, response, failed);
    }
마찬가지로 반대로 스레드로컬에서 해당 Authentication을 정리한다.
이후 failure handler가 진행된다. configurer코드를 보면 기본값은 failure handler로 가게 되어 있다.
참고:
https://docs.spring.io/spring-security/reference/servlet/authentication/passwords/form.html
Form Login :: Spring Security
When the username and password are submitted, the UsernamePasswordAuthenticationFilter authenticates the username and password. The UsernamePasswordAuthenticationFilter extends AbstractAuthenticationProcessingFilter, so the following diagram should look pr
docs.spring.io
및 External libraries: spring-boot-starter-security-x 패키지
'Spring > Spring Security' 카테고리의 다른 글
| 부록: JPA 엔티티에 UserDetails, OAuth2User 구현하지 말기 (0) | 2024.09.01 |
|---|---|
| 부록: 빈 생성 기능과 필터체인 분리 (0) | 2024.09.01 |
| Spring Security 6 - OAuth 2 Client 간편 로그인 | 카카오 로그인 (3) | 2024.08.31 |
| Spring Security 6 - 컴포넌트 빈 정의 (0) | 2024.08.29 |
| Spring Security 6 시리즈 작성계획 (0) | 2024.08.29 |